Executing C / C++ Programs with Code Blocks on Windows 7 / XP / Vista

After having worked with Turbo C on Windows XP, GCC with Linux and combination of DOSBox and Turbo C on Windows 7, I wanted to find out some better alternative. That is when I came across Code Blocks. You can use this software to write and execute C and C++ programs.For more amazing features about this great piece of software, check out the features page on Code Blocks official site.



Downloading Right Version
There are 3 different types of downloads provided on the main site, out of which you must download the binary release. On that page, select the appropriate version according to your needs. In my case, for Windows 7 (64 bit) I chose the codeblocks-10.05mingw-setup.exe (make sure you download the MinGW version).
Installing Correctly
Once you are ready with the setup file, just run it and keep hitting next until finish. You will be asked to accept the agreement, given option to select the compiler etc. You can configure them later as well. Some of the screens which you will pass through are as follows:


Setting Up Code Blocks
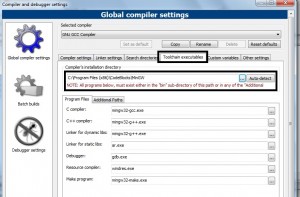
Once you have installed Code Blocks, it will auto detect MinGW location which was incorrect in my case and so the software was not able to compile code and hence was unable to execute it. To fix this problem you need to perform some changes. Open Code Blocks > Click on Settings > Compiler and debugger..
In the Compiler and debugger settings window, click on “Global Compiler Settings” (which will be selected by default). In the tab that opens in the right part of the window, select the “Toolchain executables” tab. Under “Compiler’s installation directory” browse to the correct path if it is incorrect. In my case it was earlier stored as C:\MinGW where as it was supposed to be “C:\Program Files (x86)\CodeBlocks\MinGW“. After setting the details correct, click on “OK“.
Creating New Project
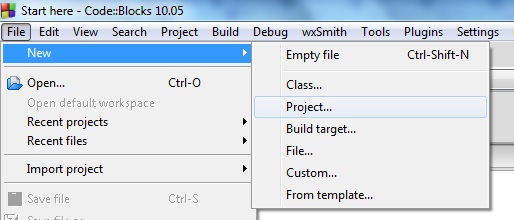
Click on File > New > Project



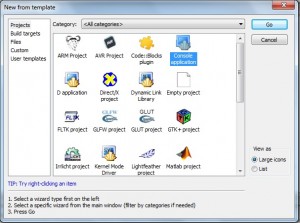
Select Console Application as category of the project.
Press Next > Select the language C / C++ according to your preference. Press Next again.
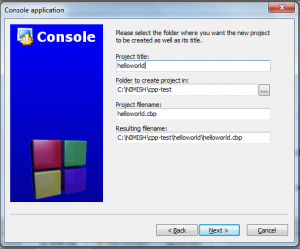
Fill the Project Title and choose the appropriate location for the project and click Next.
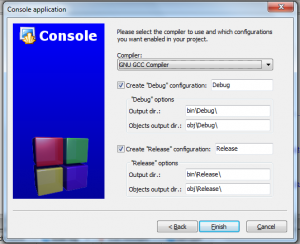
On the next screen, keep the options as they are and click on Finish.
Running the First Program
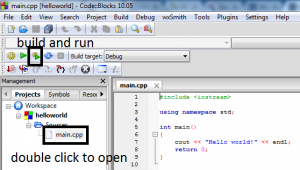
You will see the Project Management Window on the left side of the Console. Expand the Sources and double click on “main.cpp” to open the file in the right window of the console. Now click on build and run icon to compile and execute the file. If you wish to just build, you can click on build, similarly you can click on run to simple execute the already built file.
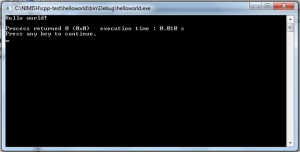
Enjoy the output.
Hope you liked the tutorial, if you have any queries, post a comment using the form below and I will get back to you.






good