How to Create Subnets in Oracle Cloud Infrastructure (OCI)
Subnets are logical divisions of a virtual cloud network. We can create one or more subnets in a VCN each of which has a range of non-overlapping IP addresses. This range of address is determined by CIDR blocks.
Let us understand this by taking example of VCN we have created in previous tutorial: How to Create Virtual Cloud Network.
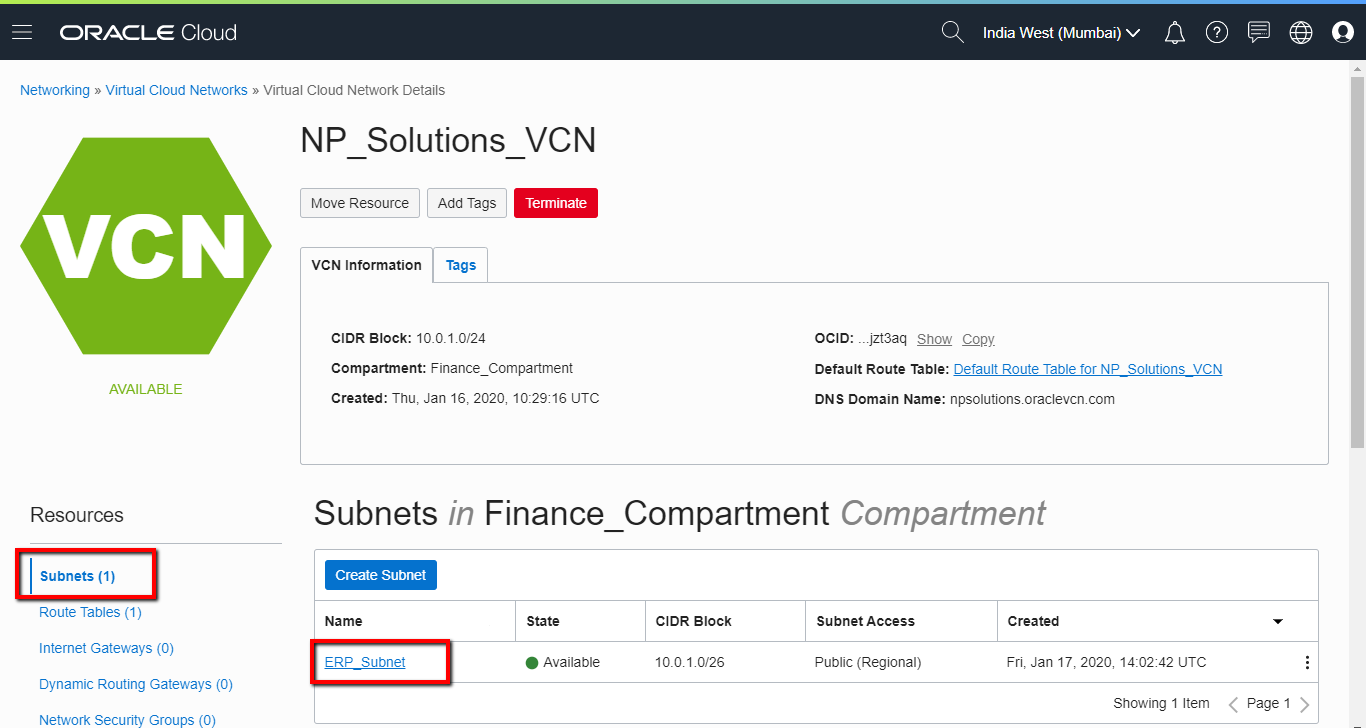
We have a VCN named NP_Solutions_VCN having IP Address CIDR block as 10.0.1.0/24 (i.e. IP address range from 10.0.1.0 to 10.0.1.255)
Now, our subnet must have a range of IP addresses within this block.
For this example, we will create a subnet with CIDR block 10.0.1.0/26 (i.e. IP address range from 10.0.1.0-10.0.1.63 -> 64 IP addresses)
If you were to create another subnet with 64 IP addresses, you can do by creating a new subnet with CIDR block 10.0.1.64/26. This subnet would then have IP addresses ranging from 10.0.1.64-10.0.1.127. This example should clear your understanding of creating subnets.
Now, before we begin creating a subnet, we will obtain necessary details for the same. They are as follows:
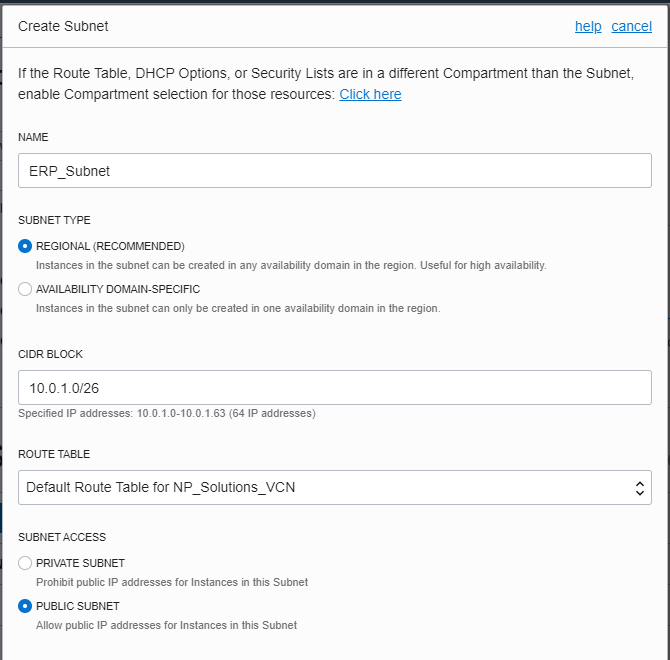
- Subnet Name: E.g. ERP_Subnet
- Subnet Type: Regional or Availability Domain-Specific, in almost all cases we select Regional and it is the recommended approach. For this example we will select Regional option.
- CIDR Block: E.g. 10.0.1.0/26 (10.0.1.0-10.0.1.63 -> 64 IP addresses)
- Route Table: You can use the default route table for the VCN, or you can a create a custom route table depending on your requirements. For this example we will select default option.
- Subnet Access: Private Subnet or Public Subnet. If you require to setup a private subnet, you will have to either setup IPSec VPN connectivity between your on-premise network and VCN. Other option is to create another public subnet in same VCN. Then create a bastion host in public subnet and access machines in private subnet via this bastion host of public subnet.
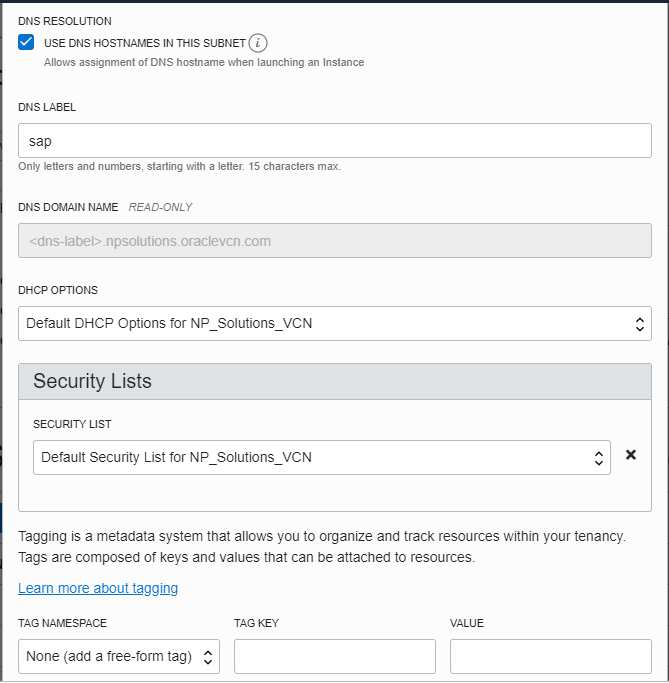
- DNS Label: name for your subnet which will be used in Instance’s FQDN along with VCN DNS label. For e.g. if your VCN’s DNS label is “finance”, subnet’s DNS label is “sap” and instance’s hostname is “entserver” then Instance’s FQDN would be “entserver.sap.finance.oraclevcn.com”. For this example we will use DNS Label for this subnet as “sap”
- DHCP Options: Select default DHCP option of the VCN or create custom DHCP options based on your requirement. For this example we will select default option.
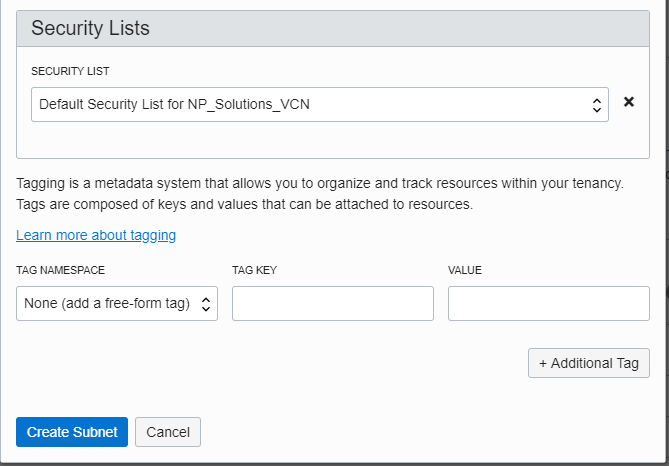
- Security List: Select default Security List option of the VCN or create custom Security List based on your requirement. For this example we will select default option.
Let us now look at the steps for creating a subnet in Oracle Cloud Infrastructure.
Step 1: Login to Oracle Cloud Network
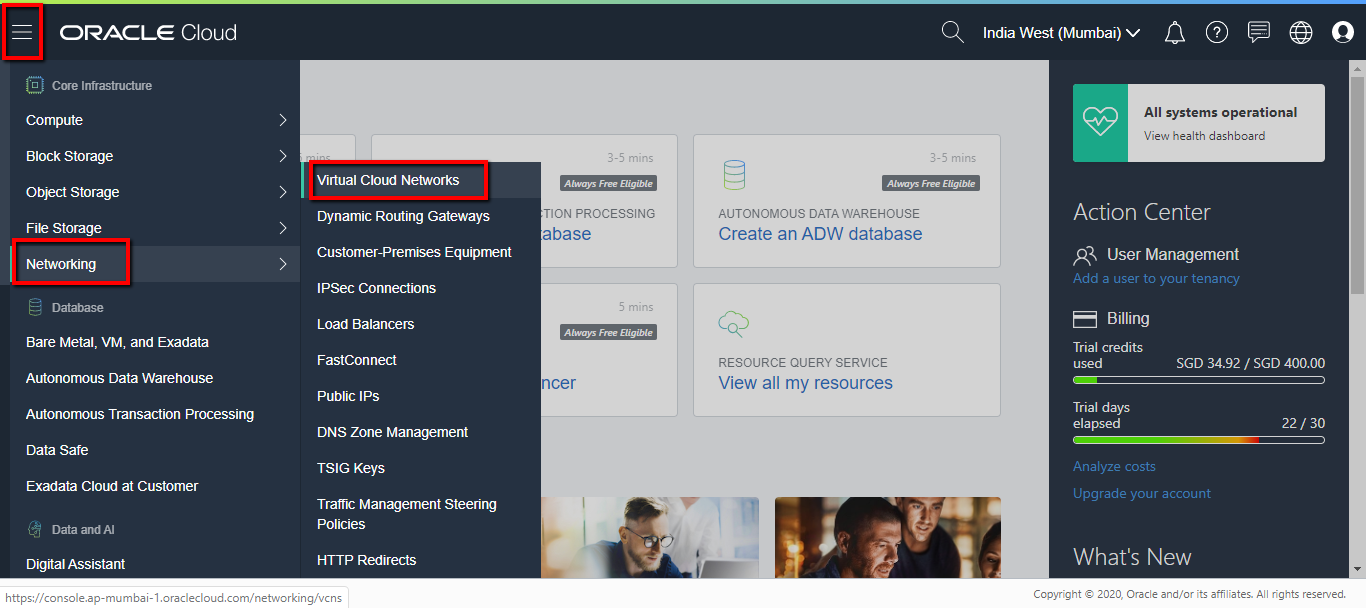
Step 2: Select Virtual Cloud Networks Menu
Click on hotdog menu, hover over Networking option and click on Virtual Cloud Networks
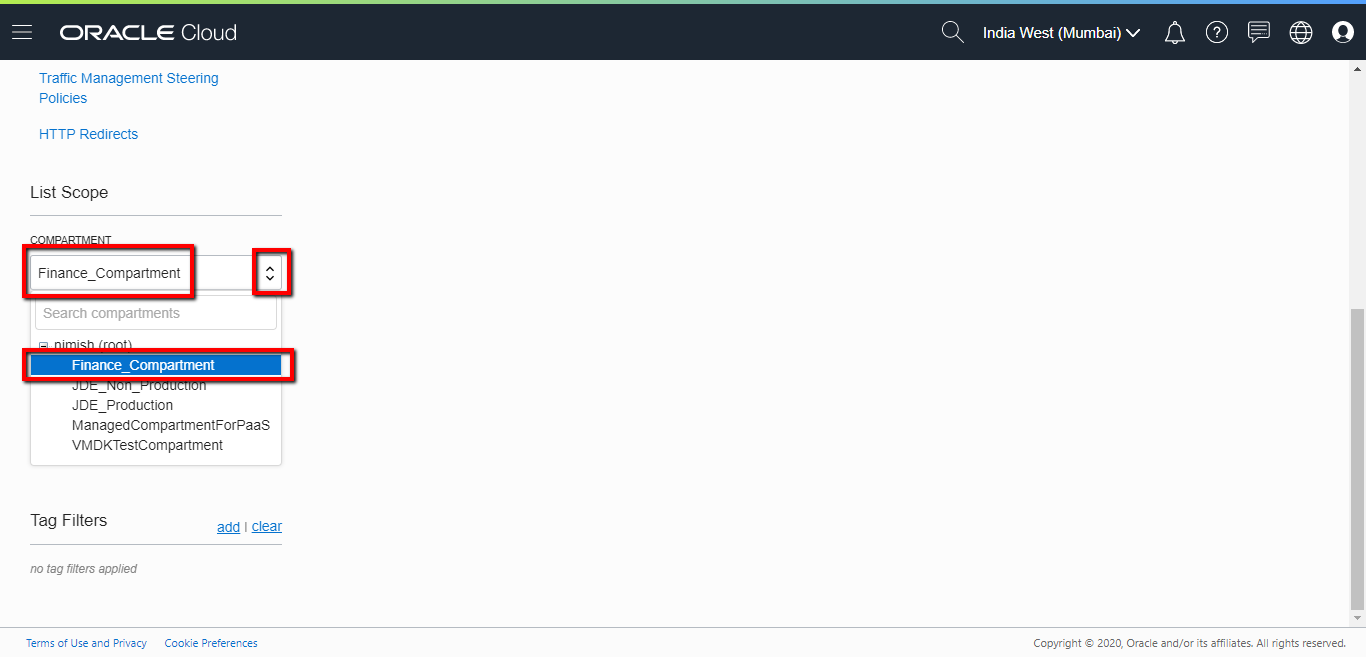
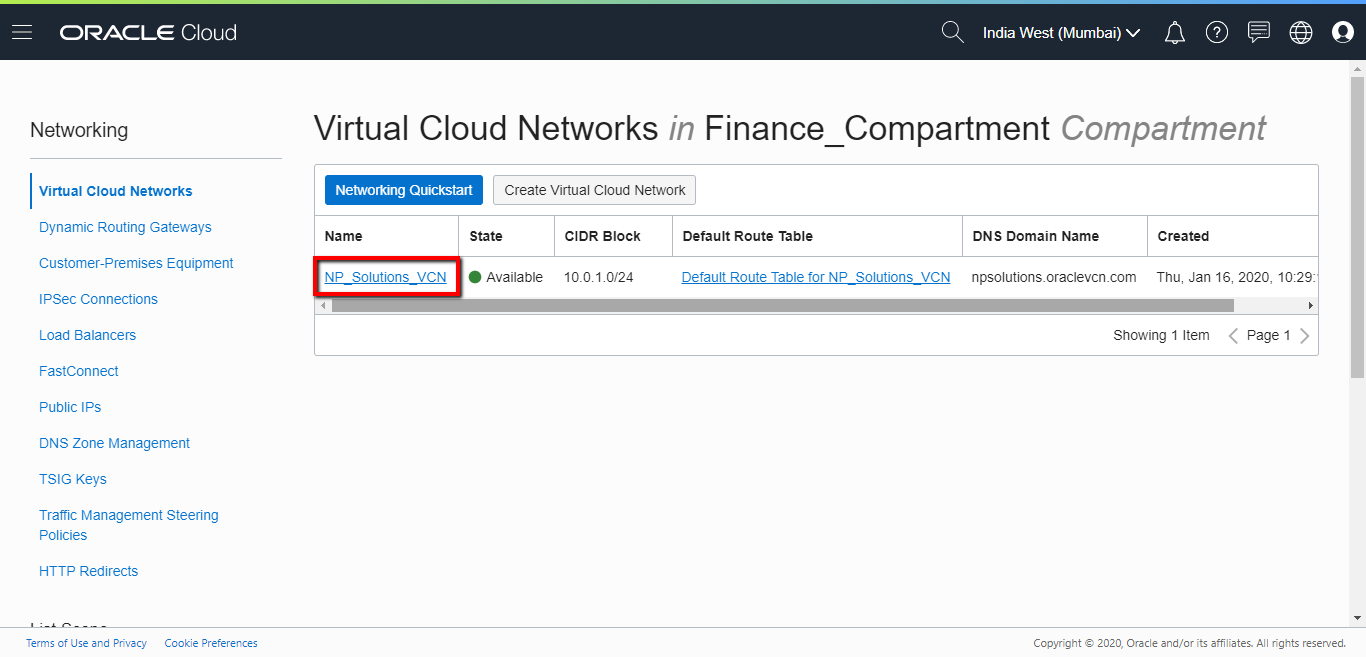
Step 3: Select correct VCN’s compartment
From the left hand side menu, scroll down and from the Compartment drop-down box, select Compartment where your parent VCN for subnet exists. For this example, our VCN “NP_Solutions_VCN” was created in Finance_Compartment, hence we will select the same.
Step 4: Click on VCN name
After you select correct compartment, scroll up to find list of VCNs in that compartment. You should be able to see your existing VCN in it. Click on the Name of the VCN to navigate to VCN page.
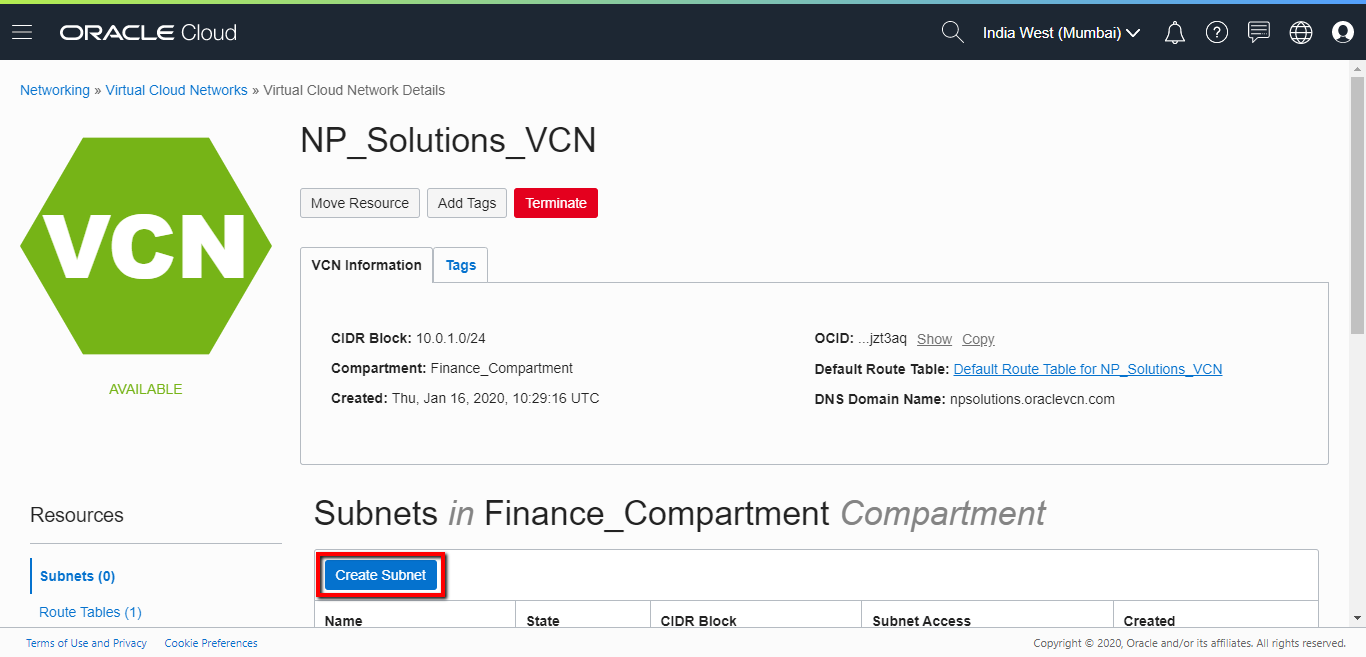
Step 5: Click on Create Subnet button
Once inside VPN page, on content side of the page below VCN details box, you should be able to see list of subnets inside that VCN. Since this is the first subnet we will be creating, there are no subnets existing already. Click on blue button “Create Subnet“
Step 6: Enter details and Create Subnet
Use the details we had gathered earlier to fill in details and select correct options. At the end of the screen, click on “Create Subnet” button.
Step 7: Validate Subnet Created
You should be able to see the newly created subnet under list of subnets in the VCN.