Uninstall JD Edwards Standalone Demo + Oracle Database
Few months ago I had posted an article about Installing JD Edwards Standalone Client on Windows 7. I had myself installed the client in my laptop back then but as time progresses and you start creating more and more projects, JDE starts consuming lot of space on your hard disk. That is why I decided to uninstall the same. I’m listing down the steps about how to completely remove JDE Standalone from your system.
Uninstalling JDE will require uninstalling various components you had installed during its setup. So we will remove them one by one.
Let us begin with uninstalling the JDE Client first.
Uninstalling JD Edwards Standalone Client
- Before proceeding to uninstallation, make sure “activeconsole.exe” is not running. If it is, then kill it using task manager. Also kill “jdenet_n.exe”.
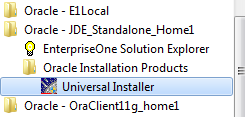
- Go to Start > All Programs > Oracle – JDE Standalone Home1 > Oracle Installation Products > Universal Installer

- Click on Yes when UAC prompt comes up.
- A command prompt will be launched, wait till it starts the Universal Installer.
- Click on “Deinstall Products…” in the Universal Installer.
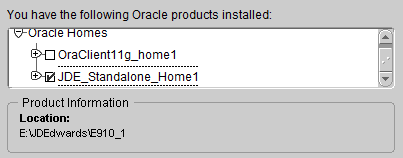
- Select the “JDE_Standalone_Home1”
- Click Remove.
- On “Confirmation”, Click “Yes”.
- Uninstallation will take some time (about 10min, in my case) to finish. Have a cup of coffee till then.
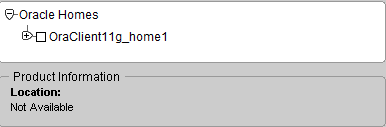
- Inventory prompt will pop up showing that JDE_Standalone_Home1 component is removed.
- Verify if the folder is completely removed, if not delete it. In my case the folder was located at :
E:/JDEdwards/E910_1
You have removed the JDE standalone client successfully.
Uninstall Oracle Client 11g
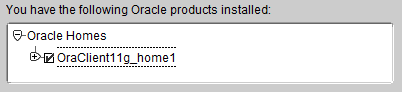
- If you have followed the steps correctly, just click the checkbox in the Inventory window against “OraClient11g_home1”
- Click on Remove.
- This will lead to a prompt telling you the location of the file which is supposed to be run.
Adjust the size of the warning window to clearly see the path. Click Ok and then cancel to close the Oracle Universal Installer. - Make sure Oracle Universal Installer is closed.
- Open command prompt as adminstrator and run the bat file as follows (your path might be different, please verify) :
Next, follow the options mentioned in the square brackets. - Run command prompt as admininstrator.
- Next run the following command :
“C:\Oracle\E1Local\deinstall\deinstall.bat” - After the deinstall completes, delete the folder “C:\Oracle\E1Local” if it exists.
- Now we need to clear registry keys for EnterpriseOne if any, Go to Start > Run > regedit
- Navigate to HKEY_LOCAL_MACHINE\SOFTWARE\Oracle
- Delete KEY_E1Local if exists
- Navigate to HKEY_LOCAL_MACHINE\SOFTWARE\Wow6432Node\Oracle
- Delete KEY_E1Local if exists
- Navigate to HKEY_LOCAL_MACHINE\SYSTEM\CurrentControlSet\Services
- Delete OracleE1LocalTNSListener and OracleServiceE1LOCAL, if exists.
- Close all applications
- Reboot your system
- Delete C:/Oracle/E1Local
- JDE Standalone Demo and Oracle Database Uninstallation is complete.

Please comment below if you face any problem while uninstallation of JDE or Oracle Database.