Choosing Correct Audio Drivers for Your Windows XP Installation
After changing the motherboard for my desktop PC, I realized that I needed to install audio drivers again. I read many things online before I finally got my PC playing sound properly. This tutorial goes for everyone who is stuck in such a situation. Follow the below mentioned steps to get correct audio drivers for your system.
- Right click on My Computer
- Choose Properties
- Select Hardware Tab
- Click on Device Manager
- Expand the menu where it says “Sound, video and game controllers”

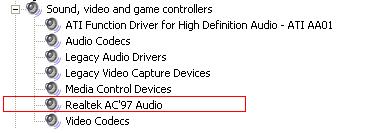
Now, in my case I could see “Realtek AC’97 Audio”. So I began searching for the same. I tried 3 different installations out of which the last one worked. You can find the drivers which worked for me on kioskea download page.
Download the drivers and install them. You will need to click on “Next” couple of time and “Continue Anyway” warnings while installation. Once the installation is complete, it will reboot the system. After reboot make sure you select the correct driver under Audio settings. To do so, follow these steps :
- Right click on Sound icon in task bar.
- Click on “Adjust audio properties”.
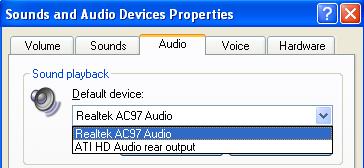
- Select “Audio” tab.
- Choose correct “Default Device”.
- Hit Apply.
- Hit Ok.
Your sound driver installation is complete now. Have fun.